Company Settings: Mailboxes
When your system profile is created, a default mailbox is automatically generated. The default mailbox is used for all bulk emails originating from the solution.
Emails can be sent from the solution, however it does not support inbound emails.
Replies to the Default and User mailboxes will be redirected to the specified Inbox associated with the person's email address supplied in the "Reply to Address" when setting up the mailbox(es).
Two options are available when setting up your Default mailbox:
Option 1: Redirect inbound emails to a specified inbox (i.e recipients can reply to emails sent from the solution).
Option 2: No-reply mailbox (i.e. You can send bulk emails from your solution but the recipients cannot reply.)
Setting up your Default mailbox
Navigate to Company Settings>Mailboxes>Edit
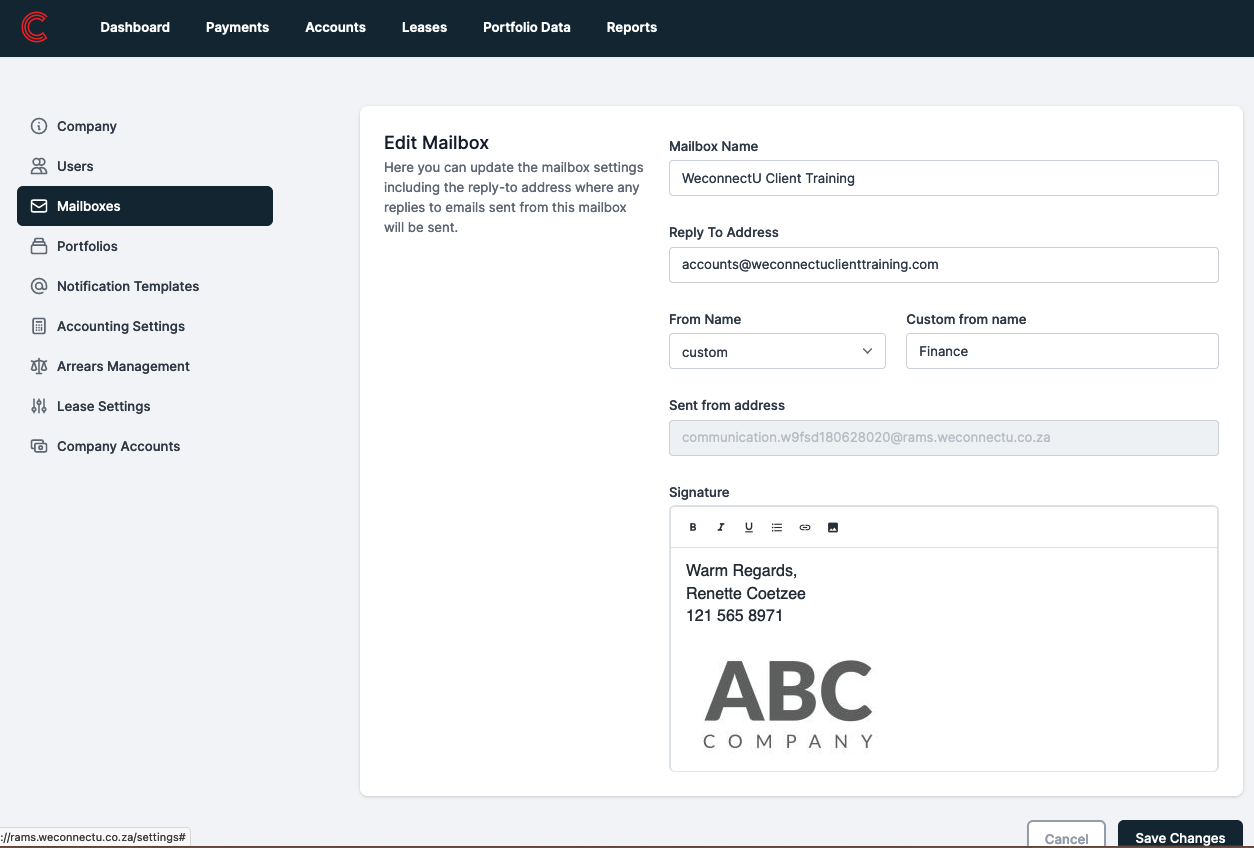
| Field | Description |
| Mailbox Name | You can choose a name for each Mailbox you create. This name will appear in the list of mailboxes created on the solution. (e.g. Accounts Department or the User's name) |
| Reply to Address |
The email address to which a reply should be redirected to when a recipient responds to an email sent by a User. (e.g. To redirect replies for bulk emails sent out from the solution to your accounts department, replace the email address with your default account department's email address) For No-reply mailbox, keep the default address as your reply to address. |
| From Name |
The 'From name the recipient will see in their inbox, this can be the User's Name, Mailbox Name or a Custom Name which you can specify. For No-reply mailbox, set the From Name as No-reply. |
| Signature |
In the space provided, you can either create a text signature or upload a branded signature image file.
|
Set up your User specific mailboxes
Before creating your User mailboxes, make sure to set up the customisation of your default mailbox
You can create numerous mailboxes that can be allocated per User or to a specific department within your company. To create a new User mailbox, click on the New Mailbox button at the top right of the page and complete the form.

Once created, you can edit the details and add a signature for the mailbox by clicking on the word Edit next to the Mailbox detail.
End of article